


How to make a custom track for RC cars
- Posted on
- Posted in Arts & Crafts
Customising and racing remote-controlled cars is a thrilling hobby, made even more exciting with the use of a vacuum former. With tools like the MY YARD FORMART, enthusiasts can create custom car shells, unique track decorations, and even modular track sections, adding a personal touch to both the cars and the racing environment.
Customising and racing remote-controlled cars is a thrilling hobby that combines creativity, technical skill, and the excitement of competition. Enthusiasts start by choosing a base model of car, whether it's an off-road buggy, a sleek on-road racer, or a versatile truck. The real fun begins with customisation, where you can modify almost every aspect of the car. From upgrading the motor for more speed to fine-tuning the suspension for better handling, each adjustment can make a significant difference on the track.
Boosting performance is great, but you also want to look good while racing. This is where vacuum forming comes in: with a vacuum former you can make your own custom shell for the body of your RC car. Painting the bodywork in your unique design adds a personal touch, making your car stand out on the track.
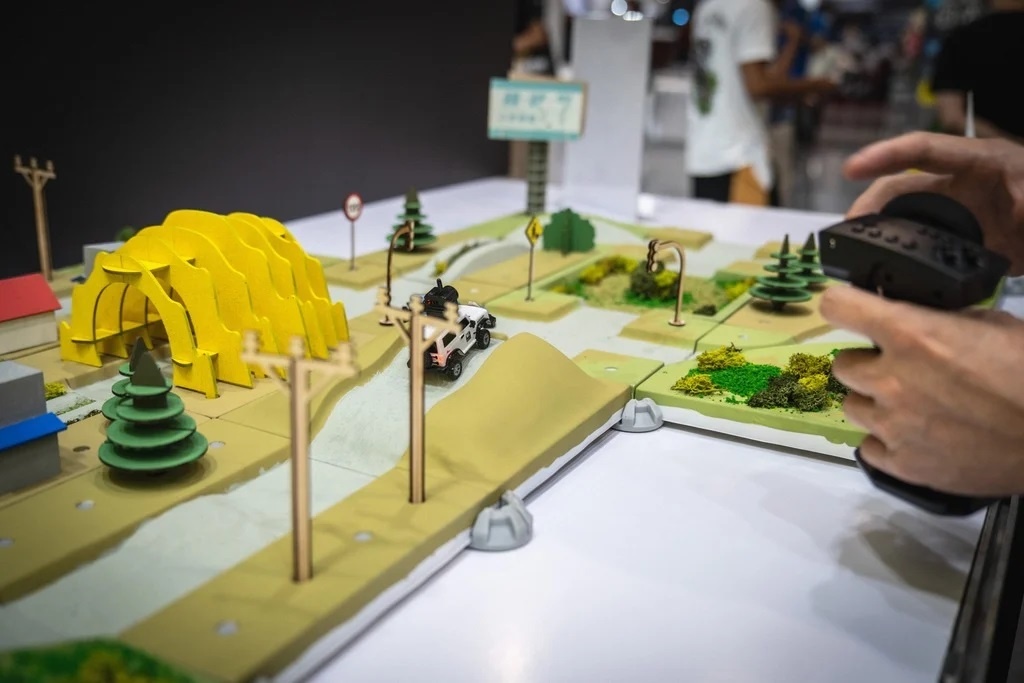
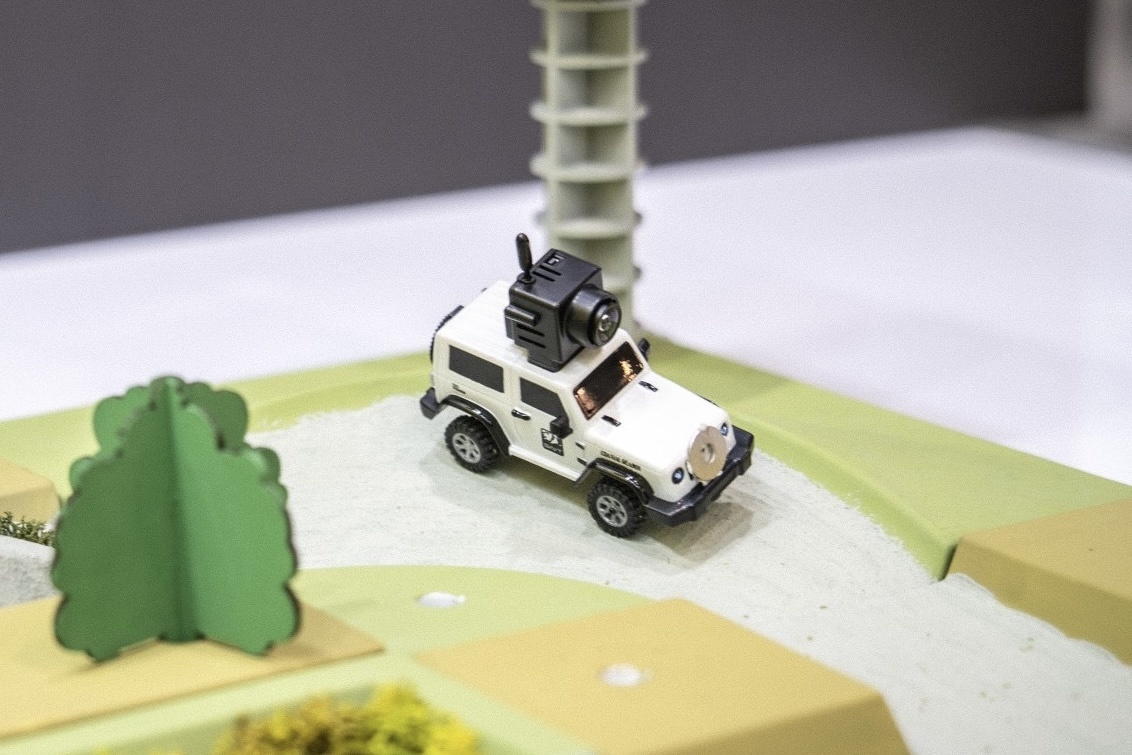
But the fun doesn’t have to stop there! You can also use a vacuum former to create track decorations or obstacles. If you are racing RC cars that are small enough, you can even use our MY YARD FORMART vacuum forming machines to create entire track sections.
In the video below, you can see how we created a modular track set for 1:64 scale RC cars, featuring 13 different terrain modules that you can mix and match as you please. Each module is equipped with assembly holes for accessories, allowing you to unleash your imagination and customise the track to your heart’s content.
Eager to start building? You can find all the necessary files and instructions below.
Files
Machines
- 3D printer
- MY YARD FORMART 2 vacuum former
- Laser cutter
Materials
- HIPS 1.0 mm sheet
- White spray paint
- Water-based cement paint
- White glue
- Model grass powder and tree material
- SNICLO 1/64 Micro FPV off-road car
Instructions
- Download the STL files from the links above and print them with your 3D printer. You will need to set a 1.5 mm shell with 30% infill.
- Put the moulds for the track parts on your vacuum former and use a HIPS sheet to form the shapes. You can repeat this step if you need multiple copies of a track tile.
- Clean the track parts to remove any residue or dust before you begin painting them.
- Before you start painting the track, spray a thin layer of white spray paint on the tiles to make it easier for the cement paint to adhere.
- Use the water-based cement paint to add colour to your track parts.
- Once the cement paint is dry, apply white glue to the places where you want to stick the grass powder or bush material. Then sprinkle the grass powder over the area and stick on the bushes and trees.
- We have included some track decorations in the download above. You can cut them with a laser cutter and add them to your track. We used a FLUX Ador laser cutter and engraver to make our decorations and print on them.